


Introduction
Every developer wants to ship a bug-free production application, but we must consider how we can integrate tests into our apps. There are many testing tools, frameworks, and types of tests available to us. In this Blog, we set up Cypress for the End-To-End test of our React application.
Prerequisites
- Node.js installed on your machine,
- Familiar with npm packages,
- Familiar with fundamentals of React.js
What is Cypress
Cypress testing is a framework that allows web developers to write automated tests in JavaScript. It is similar to Selenium but has a different architecture that makes writing and running tests more accessible. Cypress is targeting Unit Testing, Integration Testing, and End-to-End Testing.
Benefits of testing with Cypress
These are the enormous benefits of testing with Cypress:
- Ability to take screenshots and video recordings of tests,
- Time travel debugging,
- Live code reloading,
- Current and previous state differentiation,
- The option between running headless tests or testing in a browser,
- Asynchronous testing,
- In-browser debugging environment.
Getting started with Cypress
Installation
Firstly you need to access your React application, Then install Cypress on your application development environment.
npm install --save-dev cypress
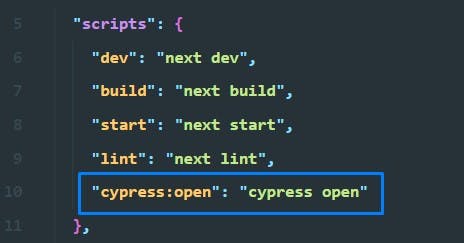
Update your packeg.json folder
Open your packeg.json folder and add this script "cypress:open": "cypress open" on the script section.
Now, if I want to run Cypress, we can use npx cypress open in the Terminal.
Let’s run this command in the Terminal to open Cypress.
npx cypress open
Warning: If your command is showing an error, try to run your command in CMD
After running the command, the Cypress window will open up.
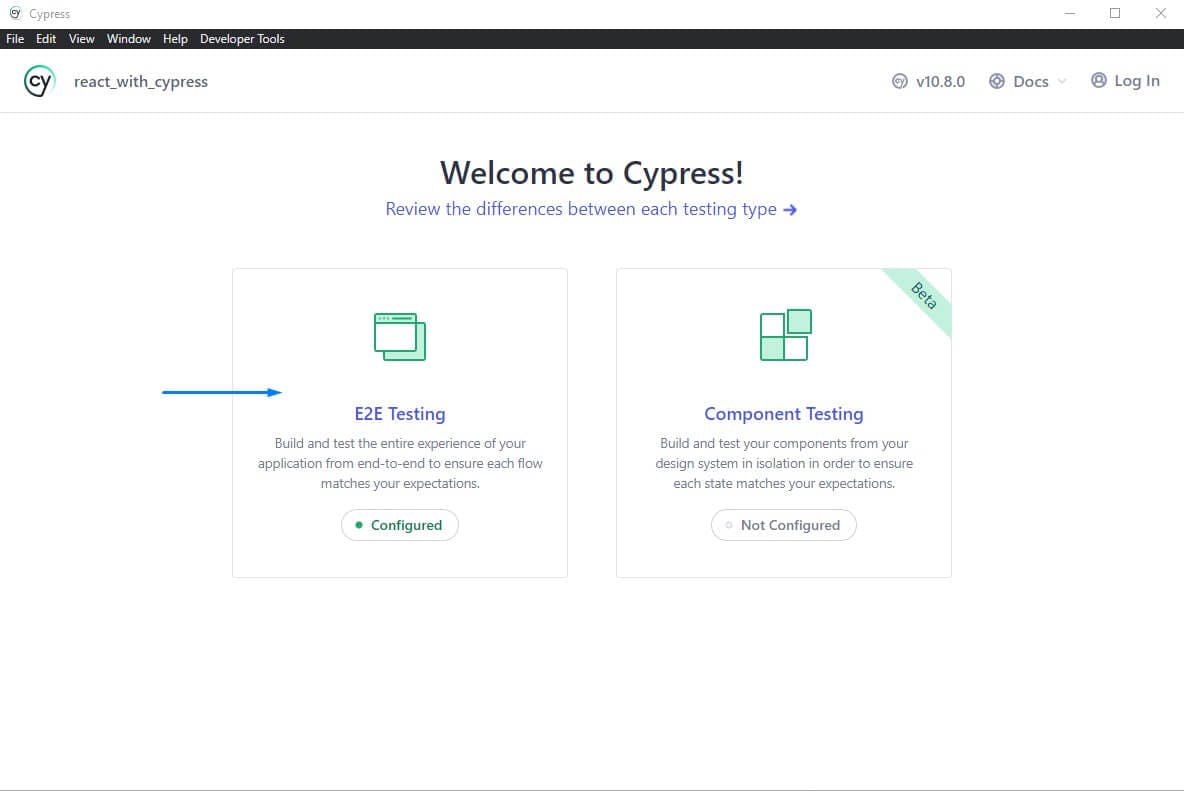 Click E2E testing to continue.
Then choose your preferred browser, in my case, it's Chrome.
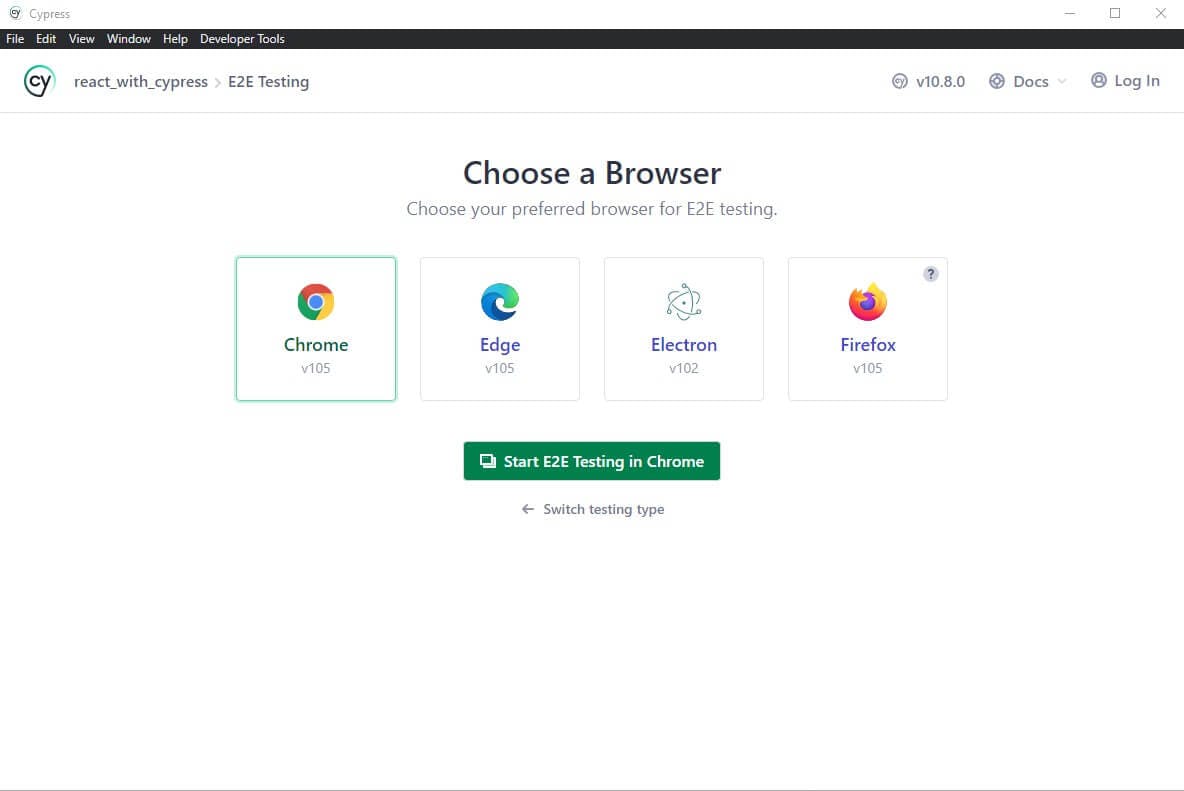 Then click E2E testing in Chrome.
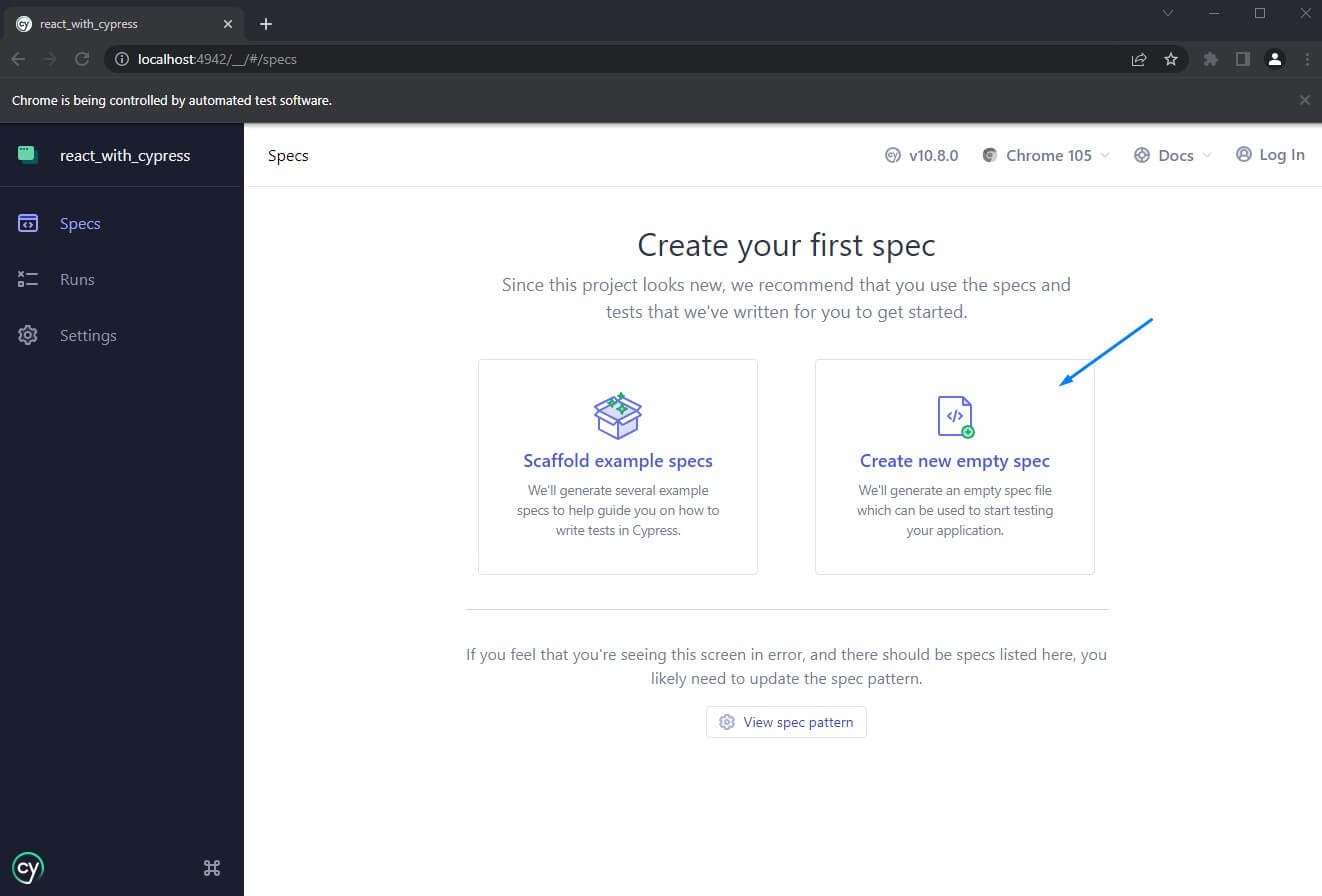
In the next step, create an empty file by clicking the Create new empty spec button
After finishing all the steps, we successfully set up our testing platform.

In the second part of this Cypress Blog, we will cover:
- How to run the different tests on different files,
- All the basic commands for testing,
- How to perform group tests,
- What is the beforeEach function and lots more.
Conclusion
And there we have it! We have successfully set up our End-To-End test with Cypress. If you want to learn more about Cypress, check out their official docs. You can also check out the Cypress blog for some great articles on testing your React application.
If you have any queries or questions about the article, feel free to leave a comment below.